Monday, August 31, 2015
Aftermath v6 for xolo a500s
Moist feature of the rom
175mb+ Ram
Good for gaming (asphalt 8 running smooth!!)
Smooth ui
No lagging
No bugs
Android l ui material design
Xposed framework working
New notification bar
And many more!!
Good for gaming (asphalt 8 running smooth!!)
Smooth ui
No lagging
No bugs
Android l ui material design
Xposed framework working
New notification bar
And many more!!
Credit: Pranav Reddy
After install the rom Ips user just flash the patch
click here to download ips s003 patch


How To Flash This Rom
REQUIREMENTS :
1: Your phone must be rooted. If not rooted
please root your phone.
Here Is the Complete Guide of Rooting
1: Your phone must be rooted. If not rooted
please root your phone.
Here Is the Complete Guide of Rooting
2:Your phone must me installed
an custom Recovery
Here Is the Complete Guide of installing Custom Recovery
PROCEDURE
an custom Recovery
Here Is the Complete Guide of installing Custom Recovery
PROCEDURE
First Go To Recovery Mode :
Turn off the Phone Press and hold
" Volume Up + Power " Butons
to go to recovery mode
THEN FOLLOW THOSE STEPS
ACCORDING TO YOUR RECOVERY
1.wipe data factory reset --> Yes--delete
all user data
2. - wipe cache partition --> Yes--Wipe
Cache
3. - advanced --> Wipe Dalvik Cache -->
Yes--wipe dalvik cache
4. - mounts and storage --> Format /
System /data /cache (Recommended)
5. - install zip from sd --> - choose zip
from sdcard --> - Select Zip
6. - reboot System now
TWRP
1.First Open TWRP Recovery
(Turn Off your ph and press and hold
Vol Up + Power Key To open Recovery)
2.wipe--->cache--->swipe to wipe
--->dalvik cache--->swipe to wipe
--->factory reset--->swipe to wipe
--->system--->swipe to wipe
3.install--->choose zip(your rom)--->swipe ti install
CTR
1.First Open CTR Recovery
(Turn Off your ph and press and hold
Vol Up + Power Key To open Recovery)
2.wipe--->wipe cache--->Yes
-->wipe dalvik cache--->Yes
--->wipe data - factory reset--->Yes
3.install--->choose zip(your rom)--->Yes
Now reboot your phone and enjoy new custom Rom
OUR FACEBOOK GROUP
JOIN HERE FOR LATEST UPDATES
JOIN HERE FOR LATEST UPDATES
PureXperia Z3 ROM for Xolo A500s
PureXperia Z3 ROM for Xolo A500s (Mediatek mt6572 devices)
Introduction:
Modded Xperia C Rom to give you a Xperia Z3 (4.4.4) Sirius feel
Features:
-Based on Latest Xperia C 16.0.B.2.16 Base
A. Xperia Z3 HOME & Simple Home
B. Xperia Z3 Themes
C. 13MP Rear and 8MP Front Camera
D. Xperia Z3 SystemUI
E. Xperia Z3 Framework
F. Xperia Z3 Media Apps
G. Xperia Z3 System Apps
H. Xperia Z3 Widgets
I. Latest Xperia Keyboard
J. Xperia Z3 Fonts
K. Xperia Z3 Smart Social Camera
L. Xperia Z3 Style Settings
N. Xperia C3 Style Camera
O. Xperia Z3 Wallpapers
P. Xperia Z3 Sounds
Q. Xperia Z3 Bootanimation
R. True Viper4Android/Dolby Integration
S. Xperia build.prop
T. No network/Wifi issues
U. 3G SIM Switching
V. S-Force Surround Sound 3D
W. SeraJR QuickSettings Toggles
X. Battery Savings
Y. Advanced Reboot Menu
Z. Compatible with Xposed Modules (JB)
Z1. Smart Gestures
Z2. No Bloatwares
Z3. Xperia Z3 Style Task Switching
SCREENSHOTS:


Instructions:
-Download the ROM zip and Place it in Your SDCard
-Goto your Recovery Mode (CWM/TWRP)
-Wipe Cache, Dalvik Cache , Factory Reset, System, Android Secure (FOR TWRP) (Skip this step if You're using PXZ2)
OR
Wipe Cache/Dalvik Cache, Data/Factory Reset (FOR CWM)
-Install the Zip and READ EVERYTHING carefully and Follow Instructions
-1st Boot Might take upto 3 Minutes So don't panic
-After 1st boot You MUST Do the Following: It'll Prevent 90% of the Problems You'll Face Otherwise
Goto Settings>Storage> Preferred Install Location
Select Device Memory there
And Select DEFAULT MEMORY TO WRITE as SD Card
NOTE2:
After 1st boot it's recommended to Reboot once
NOTE3:
To go to QuickSettings Swipe the notification panel down and swipe from Right to left
Credits:
bgos10 - Porting base, Modding, Making, Bug Fixing the whole ROM
Deep Mitra (porting to a500s nd bug fixing)
Abhinandan Trilokia (Firstly port PXZ2 for a500s nd give me inspiration to porting this)
Battlefield Bad Company 2 Apk+Sd Free Download {Direct Links}

This game is one of few that can brag of outstanding graphics and a sharp game plot. The fight district here is quite various – jungle and Arctic snow, dusty deserts and even city firefights! Pass 14 missions in five well detailed zones of battles. The weapon set in game impresses – there’re 14 types- guns, machine guns, grenade launchers, sniper rifles etc. You will be able to choose one of three schemes of control system.
Battlefield: Bad Company is a first-person shooter developed by EA DICE, released in the U.S. on June 23 2008[2] for PlayStation 3 and Xbox 360.[3] The game was hinted at just before the release of Battlefield 2,[4] and then announced sixteen months later.[5] A sequel, Battlefield: Bad Company 2 was released for the PlayStation 3, Xbox 360 and Microsoft Windows on March 2, 2010. Bad Company puts the player in a fictional war between the United States of America and the Russian Federation, where players will lead a squad of soldiers fighting Russians, MEC (Middle East Coalition) troops and Legionnaire mercenaries. The game applies some new features to the franchise, including an environment that can be almost destroyed (besides the very basic supports of buildings and certain metallic structures like antennae), [6] and a single-player storyline. The single-player campaign and some multiplayer maps take place in Europe, in the fictional Eastern European ry of Serdaristan, and an unnamed fictional Middle Eastern ry of the MEC in a city called Sadiz, which is located somewhere on the Caspian Sea.


Tested on:HTC Explorer A310e
Minimum System Requirements:
| O.S. | Android 2.2 |
|---|---|
| Processor | 600Mhz ARMv6 |
| RAM | 512Mb |
| Screen resolution | 480x320(HVGA) |
1.Download apk(5Mb) &.zip(560Mb) files on your SD CARD.
2.Extract .zip file using "ES file explorer".
3.Cut " bc2 " (folder) & Paste to " sdcard/ (this path)
4.install battlefield.apk & Play!!
Download link:-
Apk (5mb)
Sd data (560mb)
WWE 2K14 Pc Game Full Version Free Download

Preorder
Step in to the ring with some of the most influential wrestlers of all time including Hulk Hogan, Andre the Giant, The undertaker, HHH, The Rock and Stone Cold Steve Austin.
Wrestle in over 45 historic matches from 3 decades of Wrestlemania including the immovable object against the unstoppable force, and Icon vs Icon.
Enter the WWE Universe a fresh face by creating your own wrestler and working your way through the ranks until you’re in a position to challenge for a title.
Screen Shots !!


Name: WWE 2K14
Genre: Fighting
Platform: PC 2 Players
Developer: Yukes
Publisher: 2K Sports
WWE 2K14 System Requirement
Processor= Intel Core 2 DUO 2.4 GHz RAM= 2GB
Graphics= 512MB
Download Here
Crysis 3 Digital Deluxe Pc Game Reloaded Crack Full Version

Find New and High Tech Weapons in Crysis 3 Digital Deluxe PC Game
Title: Crysis 3 Genre: Action, ShooterDeveloper: Crytek StudiosPublisher: Electronic ArtsRelease Date: 02-2013Size: 14.52 GB / Split 16 part 990 MB Compressed
Crysis 3 Digital Deluxe pc game comes with in a bundle of luxurious versions, the Hunter and the original Crysis. It is a type of first shooter person played in the scary environment of New York City.
Uninvited alien lands in NYC. You have missions to uncover their motives and beat them down inside out. Find more features in the third version of Crysis. Use the ultimate sandbox shooter and experience the fun shooting game with the stunning visuals.
Save the city and the world by hunting the human and alien foes. You also have the chance to uncover the fact behind your squad death in this Crysis 3 Digital Deluxe pc game.
Screenshots:-


Minimum System Requirements:
• OS: Windows Vista/7/8
• Processor: Intel Core 2 Duo @ 2.4 Ghz / AMD Athlon 64 X2 5200+
• Memory: 2 Gb
• Video Memory: 1 Gb
• Video Card: nVidia GeForce GTS 450 / ATI Radeon HD 5770
• Sound Card: DirectX Compatible
• DirectX: 11
Download links:
Download Batman Arkham Origins Pc Game Highly Compressed

Batman Arkham Origins is the next installment in the blockbuster Batman: Arkham video game franchise. Developed by WB Games Montréal, the game features an expanded Gotham City and introduces an original prequel storyline set several years before the events of Batman: Arkham Asylum and Batman: Arkham City, the first two critically acclaimed games of the franchise. Taking place before the rise of Gotham City’s most dangerous criminals, the game showcases a young and unrefined Batman as he faces a defining moment in his early career as a crime fighter that sets his path to becoming the Dark Knight.
Game Information:
Title: Batman™: Arkham Origins
Genre: Action, Adventure
Developer: WB Games Montreal , Splash Damage
Publisher: Warner Bros. Interactive Entertainment
Release Date: 25 Oct 2013
Languages: English, French, Italian, German, Spanish
Size: 8.49 GB
Minimum System Requirements:
* Operating System: Windows XP / Windows Vista / Windows 7 / 8
* Processor: Intel Dual Core @ 2.8 GHz or higher
* Memory: 2 GB of RAM (4 GB for Vista & Win 7 / 8)
* Graphics Card: 512 MB (Nvidia 8800 GT) Pixel Shader 3.0
* Hard Disk: 20 GB free disk space
* Sound Card DirectX® 9.0c compatible
* DirectX® 9.0
Screenshots:


Download links:
Batman Arkham Origins
Windows 7 Tips And Tricks (70 Hacks)
1. PC Safeguard
I rarely let anyone use my PC because I’m afraid he will mess it up, but it seems Microsoft has been thinking at me and came with a solution. The PC Safeguard doesn’t let anyone mess your PC settings, because after the user logs off, the configurations are reset back to normal. Of course it will not restore the configurations changed by you, but only the ones done by other users you define.To use PC Safeguard, go to Control Panel -> User Accounts and create a new account, then select “Set Up Pc Safeguard” and switch it on. Then you can stay relaxed when others use your computer, because you won’t find anything changed, including configurations, downloaded software, installed programs.
2. Screen Calibration
Fortunately, Windows 7 comes with a display calibration wizard that lets you set up the screen brightness properly, so you won’t have any problems viewing photos or text. The problem was that on one PC a photo could look sharp and bright and on another it looks awful. Now the problem can be fixed by pressing the Windows logo key and then typing “DCCW”.3. AppLocker
If you are usually sharing your computer with someone else, then you might want to restrict their access to your applications, files or documents. Using the AppLocker tool, you have a few options to do this by blocking other users to access Executables, Windows Installers, Scripts, a specific publisher or path.You can simply do this by pressing the Windows key then typing Gpedit.msc. Then go to Computer Navigation -> Windows Settings -> Security Settings -> Application Control Policies -> AppLocker. Right click on one of the options (Executables, Installers, or Script) and create a new rule. That should save you from a lot of headaches.
4. Burn Images
We all had trouble with image burning in Windows, because it couldn’t do it itself, a standalone software being needed. With Windows 7 this will not be a problem anymore. All you have to do is double-click the ISO image and burn it on the CD or DVD that’s inserted in the drive.5. Display Empty Removable Drives
Windows 7 will not show empty drives by default, so if you connect an empty drive to your PC, don’t worry, just go to Tools -> Folder Options -> View and uncheck “Hide empty drives in the computer folder”. This doesn’t seem like a good idea and it should not be default setting, because it will be hard for inexperienced users to figure it out. I bet a lot of users will return their newly bought drive thinking it’s broken.6. Dock The Current Windows To The Left Side Of The Screen
This new feature seems useful because sometimes it’s disturbing that windows seems to float like crazy on the screen and it’s hard to attach them to one side of it. Now this can easily be done using a keyboard shortcut. Press the Windows key + Left key (arrow) to dock it to the left side of the screen.6.1 Dock The Current Windows To The Right Side Of The Screen
Press the Windows key + Right key to dock it to the right side of the screen.
7. Display Or Hide The Explorer Preview Panel
Press ALT + P to hide it then once again to display it.8. Display Gadgets On Top Of Other Windows
Press ALT + G
9. Background Photo Slideshow
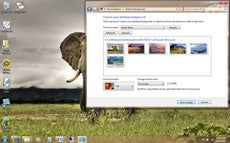
If you are like me, lazy and bored, then you will want to change the background from time to time, wasting a lot of time. Now you don’t have to do this anymore, because you can set up a slideshow.Right click on the desktop then go to Personalize -> Desktop Background and hold the CTRL key while choosing the images. Then you can choose the time intervals between images and opt to display them randomly or in a row.
10. Make The Taskbar Smaller
If you feel like the taskbar is using too much of your screen space, you can choose to make the icons smaller. To do this, right-click on the Start button, then go to Properties -> Taskbar and set it to “Use small icons”11. Combine Taskbar Icons
When you have more windows or applications opened, the taskbar’s space might not be enough for them all, so you need to combine them, just like you would in Windows XP or Vista. To do this, right-click the Start button, then go to Properties -> Taskbar and check “Combine when taskbar is full”.12. Multi-threaded File Copy
If you are a more advanced user, you’ve heard already about Robocopy. Now it’s included in Windows 7 and lets you perform multi-threaded copies from the command line. You can choose the number of threads like this “/MT[:n], which can be from 1 to 128.13. Maximize Or Restore The Foreground Window
Press Windows Key + Up Key.14. Minimize The Active Window
Press Windows Key + Down Key
15. Activate The Quick Launch Toolbar
The Quick Launch Toolbar in Windows XP and in Vista seems a very good idea that you might miss when using Windows 7. Fortunately though, you can get it back in a quick few steps.Right click the taskbar, go to Toolbar -> New Toolbar and type “%UserProfile%\AppData\Roaming\Microsoft\Internet Explorer\Quick Launch” into the folder box, then click Select Folder.
To make it look like it would in Windows Vista, right click the taskbar, uncheck “Lock the Taskbar”, then right click the divider and uncheck “Show Title” and “Show Text”. Then right click the taskbar and check “Show Small Icons” and you should be done.
16. Preview Photos In Windows Explorer
While in Windows Explorer, Press ALT + P and a preview should appear on the right.17. Desktop Magnifier
Press the Windows Key and the Plus Key to zoom in or Windows Key and the Minus Key to zoom out. You can zoom anywhere on the desktop and you can even configure your magnifier. You can choose to invert colors, follow the mouse pointer, follow the keyboard focus, or the text insertion point.18. Minimize Everything Except The Current Window
Press the Windows Key + Home Key.19. TroubleShoot Power Management
Windows 7 can tell you how much power your system uses or provide detailed information about the power usage and issues caused by each application and device. This way you can optimize the way your battery is used, making It last longer.Press the Windows Key and type “POWERCFG –ENERGY –OUTPUT ”, and it will create a file called energy-report.html in the folder specified by you, after observing your PC for 60 seconds.
20. Web Searches From Your Desktop
Windows 7 lets you search for online resources, by adding a connector that be downloaded for free.For instance, go to http://www.istartedsomething.com/flickrsearch/ and download the Flickr connector. After that, you should see the Flickr Search in your searches folder and you will be able to do it directly from your desktop, without needing to visit their website.
21. Add Videos To Your Start Menu
If you were looking for a faster way to access your videos, then Windows 7 has the right answer for you.Right click the Start button, then go to Properties -> Start Menu -> Customize and set the Videos to “Display as a link” and you’re done, you will now find them in the Start Menu.
22. Shift The Window From One Monitor To Another
If you are using two or more monitors, then you might want to move the Windows from one to another. There is a very simple way to do it.All you have to do is press the Windows Key + Shift Key + Left or Right Key, depending on what monitor you want to move it to.
23. Custom Power Button
There is an option to replace the “Shut Down” button with another action, if you rarely shut down the computer, but you more often restart it or put it on sleep.Right click the Start Button, go to Properties and choose the ‘Power Boot Action” to do whatever you want, from the given options.
24. Easily Add A New Font
Adding a new font it’s now easier than ever. Just download the font you want, double click it and you should see the install button.25. Stretch The Window Vertically
You can stretch the active window vertically to the maximum display height by pressing the Windows + Shift + Up (arrow) keys. Press Windows + Down Keys if you want to restore it.26. Open Windows Explorer
Press the Windows logo key + E to open a new instance of Windows Explorer.27. Create A New Instance Of The First Icon In The Taskbar
Press Windows + 1 Keys to open a new instance of the first icon in the taskbar. This could prove really useful in some circumstances.28. Windows Action Center
Windows Action Center offers you important information about your PC, like the Antivirus Status, updates, troubleshooting and provides a backup scheduling feature.To access it, go to Control Panel -> System And Security -> Action Center.
29. Windows Troubleshooting Platform
This platform can help you solve a lot of issues you may encounter, like the internet connection, hardware devices, poor system performance and more. You can choose what to troubleshoot and it will come with some possible explanations for the problem that might really help you.There are a lot of options, guidance and information available there, so give it a try by typing “troubleshoot” or “fix” after pressing the Windows Key.
30. Turn Off System Notifications
System notifications are usually disturbing and aren’t always useful, so you might want to turn some of them off and.This can be done in Windows 7 by double clicking the Notification Area Icons in Control panel. There you can change notifications and icons for the Action Center, Network, Volume, Windows Explorer, Media Center Tray Applet, Windows Update Automatic Updates.
31. Turn Off Security Messages
To turn off security messages you have to go to Control Panel -> System and Security -> Action Center -> Change Action Center Settings and you can turn off the following notifications: Windows Update, Internet Security Settings, Network Firewall, Spyware and related protection, User Account Control, Virus Protection, Windows Backup, Windows Troubleshooting, Check for updates.32. Cycle Through The Open Programs Via The Taskbar’s Peek Menu
This works just like Alt + Tab, but opens the menu just above the sidebar, doesn’t seem very useful. Give it a try by pressing The Windows Key + T.33. Run A Program As An Administrator
You can easily run a program as an administrator by pressing Ctrl + Shift while opening it.34. Same Program Windows Switching
If you have more instances of a program running, simply hold Ctrl while clicking on its icon and it will cycle through all the instances.35. Auto Arrange Desktop Icons
You can now forget about the Right Click -> Auto arrange. All you have to do is hold F5 pressed for a bit and the icons will auto arrange.36. Encrypt Removable USB Drives
Encrypting an USB drive has never been easier. Now you can right click on the removable drive and then on the “Turn on Bitlocker”.37. Turn Off Smart Window Arrangement
If you don’t like Windows 7’s new features that arrange your windows intelligently, there’s an easy way to turn it off.Press the Windows Logo Key, type “regedit”, go to HKEY_CURRENT_USER\Control Panel\Desktop and set WindowArrangementActive to 0. After you reboot your system the smart arrangements will be turned off.
38. Create A System Repair Disc
Windows 7 features a tool that lets you create a bootable System Repair Disc that includes some system tools and the command prompt. To create it, press the Windows Key and type “system repair disc”.39. Hard-Link Migration Store
The Hard-Link Migration store is only available for new computers and can migrate files, settings, and user accounts. The new Hard-Link Migration Store uses more less disk space and takes less time.40. Turn Off ‘Send Feedback’
If for some reason, you’re still using the Beta version of Windows 7 and if you feel disturbed by “Send Feedback button”, there is a way to turn it off. Press the Windows Key and type ‘regedit’, then go to HKEY_CURRENT_USER\Control Panel\Desktop and set FeedbackToolEnabled to 0. After you restart the computer, it shouldn’t be there anymore. Also, if you want to turn it on again, set the FeedbackToolEnabled to 3.41. Improved Calculator
Windows 7 features an improved calculator that can do unit conversion, date calculation, gas mileage, lease, and mortgage. Also you can choose between Standard, Scientific, Programmer, and Statistic calculator.42. Open A Folder In A New Process
Windows 7 opens all folders in the same process in order to save resources, but this means if one folder crashes, they all crash. So if you feel like that’s a risk you don’t have to take, then you have to open them all in their own processes.To do this, hold down Shift button, right-click the drive and “Open in New Process”. Now you will be safe.
43. Problem Step Recorder
The Problem Step Recorder is a great tool that can be used in many circumstances. You can turn it on by pressing the Windows Key, then typing “PSR.exe” and click Record. Now it will record all your moves and save them as a HTML document that you can view or write descriptions to it. This can help you with troubleshooting or when writing a guidance or tutorial.44. Free Codecs Pack
Unfortunately, Windows Media Player still isn’t able to play many audio and video files, so you will still need some codecs. But with the free codecs pack you can download here you shouldn’t have any problems.45. Start Windows Explorer From My Computer
Windows Explorer opens in the Libraries directory by default. Most of us are used to see the My Computer page instead.To change it to My Computer, press the Windows Key, then type “explorer”, select Properties and in the Shortcut tab type “%SystemRoot%\explorer.exe /root,::{20D04FE0-3AEA-1069-A2D8-08002B30309D}”. Now you have to right-click the Explorer icon in the Taskbar and hit “Unpin this program from the taskbar” and then drag it back from the Start Menu.
46. Clear The Desktop
If there are too many windows on the desktop, you can clear it by shaking a window from left to right and all others will minimize. To restore the other windows you have to shake the active one again.47. Use Gadgets With UAC Turned Off
Maybe you noticed that once you turn off UAC you can’t use the gadgets anymore, as a security measure. But if you want to risk using them, there a simple way to do it, even with UAC turned off.Press the Windows Key, type ‘regedit’, go to HKEY_LOCAL_MACHINE\SOFTWARE\Microsoft\Windows\CurrentVersion\Sidebar\Settings and create a DWORD value named AllowElevatedProcess and set its value to 1. Now you should be able to use your gadgets. If not, then reboot your PC and you should be done.
48. Fix The Media Player & Media Center MP3 Bug
If you have the final version of Windows 7, then go ahead and skip this one, since it applies only to Beta and RC versions.Both Windows Media Player and Windows Media Center come with a bug that can damage your MP3s by filling missing metadata automatically on imported MP3 files. This can cut a few seconds from the beginning of the tracks and can prove really disturbing. This problem was fixed by Microsoft using the fix that you can download here.
49. Search Everything In Your Computer
Windows 7 offers the possibility to search all file types, including unknown ones and this could help you in some cases.Though it is not recommended, because it’s much slower than normal search, you can give it a try by doing the following: Launch Windows Explorer, go to Tools -> Folder Options -> View and check “Try to search the content of unknown file types”. If you don’t need it anymore, don’t forget to clear it for an increase in speed.
50. Mouse Gestures
Windows 7 has not only brought gestures for those who use touchscreen devices, but for mouse users too. So, instead of right-clicking a Taskbar icon to access the jump list, you can hold left-click and drag upwards to smoothly call it up. In addition, clicking and dragging down the address bar in Internet Explorer will open the browsing history. There might be more gestures yet not discovered.51. Configure Your Music Favorites
The Windows Media Center creates a list of favorite songs based on how often you play them, your ratings and date you’ve added them. If you aren’t comfortable with the way they thought it out, change the way it sorts your favorites by going to Tasks -> Settings -> Music -> Favorite Music.52. Turn Off Recent Search Queries Display
Windows 7 holds and displays the recent search queries by default. This can often prove to be irritating. No need to stress though because it can be disabled.Press the Windows Key, type “gpedit.msc”, then go to User Configuration -> Administrative Templates -> Windows Components -> Windows Explorer and double click on “Turn off display of recent search entries”.
53. Advanced Disk Defragmentation
Fortunately, Windows 7 offers much better defragmentation than Vista and also lets you configure it a bit from the command line.To do it, press the Windows Key and then type “CMD”.
You can defragment your hard disk from the command line by typing “defrag” and you have the following options: “/r” will defrag multiple drives simultaneously, “-a” performs a defrag analysis, “-v” prints the report, “-r” treats files with at least 64 Mb of fragments like are not fragmented, “-w” will defrag everything. An example is “defrag C: -v -w” to defrag the whole drive C.
54. How To Make Internet Explorer 8 Load Faster
If you want Internet Explorer 8 to load faster, you need to disable the add-ons that slow it down, so go to Tools -> Manage Add-ons and check the load time for each one. You can choose for yourself the ones you can live without and ones that would increase the load speed.55. Media Center Automatic Download
Windows Media Center 12 allows you to schedule data downloads, so it can be done without disturbing you. To do it, go to Tasks -> Settings -> General -> Automatic Download Options and you can configure it to start and stop the download whenever you want.56. Remove The Sidebar
Windows 7 doesn’t seem to feature the sidebar anymore, but it still exists and runs in the background, being launched automatically at startup. So if you want to get rid of it, there are two ways.The easier one is to press the Windows Key, (or click Start), in the search box, type MSCONFIG.EXE, click the Startup tab and clear the Sidebar box. The hard way is to press the Windows key, type “regedit”, find and delete the registry key at HKEY_CURRENT_USER\Software\Microsoft\Windows\CurrentVersion\Run. This can save you some RAM consumed with no use.
57. Volume Tweaking
Don’t you like that Windows 7 automatically reduces the volume when it detects PC calls? You can turn off this feature by right-clicking the speaker icon in the taskbar, go to Sounds -> Communications and get rid of it.58. Run A Program As Another User
Windows 7 comes with the possibility to run a program both as an administrator or another user, by right clicking on the executable or shortcut while holding down the Shift key. Then you have to select “Run as another user”.59. How To Use Virtual Hard Disk Files
You can now create and manage virtual hard disks files in Windows 7 as if they were real disks. This can allow you to use a live Windows installation on the virtual disk without the need to boot the virtual Computer. To create a virtual disk you have to press the Windows Key, right-click on Computer, then go to Manage -> Disk Management -> Action -> Create VHD. There you can specify the location and size of your virtual hard disk file.To attach the virtual disk file, press the Windows Key, right-click Computer, then go to Manage -> Disk Management -> Action -> Attach VHD and you have to specify the location and if it’s read only or not.
To initialize a virtual hard disk, press the Windows Key, right-click on Computer, go to Manage -> Disk Management -> Action -> Attach VHD, specify the location, click Ok, then right click on the virtual disk and click on Initialize Disk. Select the partition style you want to use and then right-click on the unallocated space and click “New Simple Volume” and follow the instructions wizard. Now, a new hard drive appears in Windows Explorer and you can use it as a real partition.
60. Remove The Windows Live Messenger Tab In The Taskbar
To get rid of the Windows Live Messenger Tab and put it back in the system tray, where it belongs, go to C:\Program Files\Windows Live\Messenger, right-click msnmsdgr.exe and set its compatibility mode to Windows Vista.61. Lock The Screen
There is no Lock Screen button in the Start Menu anymore, so you have to press the Windows Key + L to lock it, now. It seems easier, in case you don’t forget the shortkey.62. Create A Screen Lock Shortcut
In case you don’t like shortkeys or you keep forgetting them, there’s another option for screen lock.Simply create a new shortcut to C:\Windows\System32\rundll32.exe user32.dll, LockWorkStation and place it wherever you want.
63. Enable Run Command In Start Menu
If you miss the old Run Command button in XP, then there’s an option to get it back in Windows 7.Right-click an open area in Start Menu, go to Properties -> Start Menu -> Customize and check “Run Command”. Now you should be done.
64. Improve Desktop Window Manager For Nvidia Graphics
Sometimes the animations for Desktop Window Manager don’t look very well and aren’t smooth enough and this is cause because Desktop Window Manager renders effects with no transparency and blurring, but you can turn off animations for more pleasant graphics.Press the Windows Key, right-click on Computer, go to Properties -> Advanced System Settings -> Performance -> Settings and clear “Animate windows when minimizing and maximizing”. Click OK to finnish.
65. Change Default Save Location For Files
Windows 7 is a bit different from Vista, because it saves Documents, Pictures, Videos and Music under the Public folder inside C:\Users. You might not want to save your documents, pictures, videos or music to this location, but create your own locations and you can do it quite easy.Press the Windows Key, click your username and double-click on the folder you wish to change. Then you will see Includes: 2 library locations. Click on that text, right-click on the folder you wish to set like default and click “Set as default file location”, then click Ok.
66. Make 64bit Windows Media Player Default (only for X64 users)
Windows comes with the 32bit version of Media Player by default. If you are a x64 user, you can keep the system cleaner by only installing one set of codecs.To do this, press the Windows Key, type “command”, right-click on Command Prompt and hit “Run as administrator”, then type “unregmp2.exe /SwapTo:64?”. After that, press the Windows Key, type “regedit”, go to HKLM\Software\Microsoft\Windows\CurrentVersion\App Paths\wmplayer.exe\, double click on value and change “%ProgramFiles(x86)” to “%ProgramFiles%”. Now you should be using the 64bit Windows Media Player.
67. Open Multiple Instances Of Windows Explorer Via The Taskbar
If you want to run more instances of the Windows Explorer just by hitting the startbar, you can do it by following these steps:Unpin Windows Explorer from the Taskbar, then press the Windows Key, go to Accessories, right-click Windows Explorer, go to Properties and change the shortcut path to %SystemRoot%\explorer.exe /root,::{20D04FE0-3AEA-1069-A2D8-08002B30309D} ( if you want it to default to My Computer ) or %SystemRoot%\explorer.exe /root,::{031E4825-7B94-4dc3-B131-E946B44C8DD5} ( if you want it to default to Libraries ). Now repin Windows Explorer to your Taskbar and you’re done.
All that is required for opening more instances of it is just a click of the middle mouse button. If you aren’t pleased with what you’ve done, change the shortcut path back to %SystemRoot%\explorer.exe.
68. Make The System Tray Clock Show The AM / PM Symbols
By default Windows 7 does show the time in 24 hour format, so if you want to get the AM / PM symbols, press the Windows Key, type “intl.cpl” to open Regional and Language Options, go to Additional Settings -> Time where Long Time is set to HH:mm and change it to HH:mm tt, for example, where tt is the AM or PM symbol ( 21:12 PM ). To change it to the 12 hour format, you need to type it like this hh::mm tt ( 9:12 PM ).69. Internet Explorer 8 Compatibility Mode
If your websites don’t render correctly, you might need to enable Internet Explorer 8 display them in compatibility view. This issue is because of the updated rendering engine, which causes a lot of trouble. To do it, open Internet Explorer, go to Tools -> Compatibility View Settings and check “Display all websites in compatibility view”, then click Ok.That’s it! There you go – 70 very useful tips and tricks for Microsoft Windows 7. Maybe you knew some of these but I’m sure there are some that you did not heard of. They can prove very useful and can save you a lot of time while using Windows 7.
I’m sure you’re asking yourself where’s the tip number 70? Ok, the tip or advice that will help you work faster and more efficiently, with less frustration is…
70. Just Don’t Use Windows Vista
Yes, this is very useful tip and it is strongly recommended. In fact, I should have put this one on the top of the list, so you better apply it… for your own good.MIUI V6 For Xiaomi Redmi 1s -Unofficial-
![index_0 MIUI v6 for Redmi 1s [Unofficial Port]](http://www.droidgeeky.com/wp-content/uploads/2014/12/index_0.jpg)
![index_43 MIUI v6 for Redmi 1s [Unofficial Port]](http://www.droidgeeky.com/wp-content/uploads/pep-vn/5ceb3668/index-43-7f.jpg)
MIUI 6 introduces a range of powerful features: mark unknown numbers, access free Wi-Fi with WiWide, and use the IVR system. It makes your everyday tasks easier, faster, and more enjoyable.MIUI has a reliable built-in Security Center that takes full advantage of advanced security technologies from Tencent, Kingsoft and LBE. This complete security mechanism ensures perfect privacy protection for users, and optimizes battery and data usage.
Features
- super flat processing, multiple lock screen stylefree switching.
![index_45 MIUI v6 for Redmi 1s [Unofficial Port]](http://www.droidgeeky.com/wp-content/uploads/pep-vn/cc181da5/index-45-7f.jpg)
- all were Zipalign APK optimized modify the boot animation,
- dazzling picture] [MIUI6 optimized background media scan,
- reducing power consumption and heat generation mobile phone
- T9 dialing, the status bar network speed.
- The status bar operators backstage idle automatic cleaning process optimization to reduce the response time of the touch
- screen slide to minimize the increase in electricity consumption in the case of optimized wifi / 3g signal power optimization of
- Anti-suspended animation programrunning memory optimization to maximize the remaining memory
- optimization standby highest frequency reduce standby power status bar
- [network speed setting – notification bar settings – Display real time network speed -
- Enable] [] is off by default ROOT permissions turned on – Security Center – Authorization Management – open first relatively long boot times, please be patient.
Download MIUI V6 For REDMI 1S [BY SYHOST]
Download from Weibo (Needs Password)
Password : E98S
![velocity_2 MIUI v6 for Redmi 1s [Unofficial Port]](http://www.droidgeeky.com/wp-content/uploads/pep-vn/becc13cd/velocity-2-7f.jpg)
How to install ?
First You Need To Install Custom Recovery If You Not Installed Check the Below List.
1.First Download The Zip File Copy It To Sd Card
2.Now Go To The Recovery Mode By Volume up+ Power Key
3. Enter Recovery (Twrp Or Cwm) (Turn Off, Turn On & Repeatedly Keep Pressing Vol+)
4. Select [Wipe Data / Factory Reset] → [Yes]
5. Select [Wipe Cache Partition] → [Yes ]
6. Select [Advanced] → [Wipe Dalvik Cache] → [ Yes ] → Back
7. Select [Install Zip From Sdcard] → [Choose Zip From Sdcard] → [XXX.Zip] → [Yes]
8. Wait Flash Finished, Press Back And Select Reboot System Now The Phone Going To Automatically Restart With Installed MIUI v6 Rom
All the credit goes to Syhost who patched the build and balika01 who built it. (Both from MIUI forums)
Download Link For RECOVERY
Bugs:
The reported bugs of this device are as follows :
- SIM 2 Data connection is not working.
- Camera application not working. (You can try third party camera apps or Google camera apk or the stock MI Camera PORT).
- Vibration not working.
- If there is force closing of ‘com.xiaomi.dm‘, freeze it using Titanium Backup or Root Uninstaller.
Tom Clancy’s Splinter Cell Blacklist Pc Game Highly Compressed Free Download

Tom Clancy’s Splinter Cell Blacklist Download Full Version Free For Pc
The United States has a military presence in two-thirds of countries around the world, and some of them have had enough. A group of terrorists calling themselves The Engineers have had enough and initiate a terror ultimatum called the Blacklist - a deadly countdown of escalating attacks on U.S. interests. In Tom Clancy’s Splinter Cell Blacklist the Ghost players want to remain undetected. Assault players rely on instincts and frontal blow to deal with a situation. Panther players look for lethality in the most efficient and silent way.
Game Information:
Title: Tom Clancy’s Splinter Cell Blacklist
Genre: Action, Adventure
Developer: Ubisoft Toronto
Publisher: Ubisoft
Release Date: 20 August 2013
Languages: English, German, French, Italian, Spanish
Size: 11.79 GB
Minimum System Requirements:
* Operating System: Windows XP / Windows Vista / Windows 7 / 8
* Processor: Intel Dual Core @ 2.4 GHz or higher
* Memory: 1 GB of RAM (2 GB for Vista & Win 7 / 8)
* Graphics Card: 512 MB (Nvidia 8800 GT) Pixel Shader 3.0
* Hard Disk: 25 GB free disk space
* Sound Card DirectX® 9.0c compatible
* DirectX® 9.0
Screenshots:


Installation Notes:
1. Unpack.
2. Mount the game image.
3. Install and copy the cracked contents to game install dir.
4. Play the game.
Download link:
Tom Clancy's Splinter Cell Blacklist Pc Game Highly Compressed
Word To PDF Convertor Free Download

Word To PDF Convertor Free Download:--
Perhaps there are among you who want to save or change files into MS Word format PDF File? PDF stands for Portable Document Format is now commonly used to create e-book files,correspondence, or the Form or form was another important document that is often made in the form or this PDF File Format.
Actually it is very easy to write a document in the form of this PDF File Format. One of them using software Word To PDF Converter3.0, using the Software. One way we make the previous document using MS Word, then save them as PDF File Format. With this software we will be very easy to change or convert to MS Word File(DOC) to a File to PDF File Format.
Not only Software Applications or MS Word only, but in fact Software Word To PDF Converter 3.0 can be used in almost all applications,so that we have to install Software PDF Converter is can we file as Program Save as MS Word, Excel, PDF or other software that by default is not actually available on the application so we will be very easy to Convert Document to PDF form.
Download Here-- Word To Pdf Coverter
N.O.V.A 2 HD Apk+Data Free Download

Instruction:-
1.Install APK (Don't Run)
2.Extract rar and copy "GloftN2HP" folder to "sdcard/gameloft/games"
3.Enable Internet @1st Run "To Verify Files"
4.Run Apk (Wait For Verify)
5.2nd time Play "Offline".
Screenshots:-


Download link:-
APK Download
APK
SD DATA For:-
Adreno (355mb) For Xperia+Htc Line
PowerVr (321mb) For Motorola Line
Mali (331mb) For Samsung Line
Resident Evil 6 Pc Game Free Download (18GB)

resident evil 6 pc game free download full version:--
Resident Evil 6 allows players to pick out between 3 situations with connected storylines, every with their own style} totally different design. every situation follows one in all 3 main protagonists - Leon S. Kennedy, Chris Redfield and Jake Muller. The player characters from every situation can have their own partners that ar controlled by either the pc AI or another human player via native or on-linemultiplayer. once taking part in in single player, the player will permit another player to affix in on-line at any time and inventories ar currently unbroken break away one another.A fourth situation is unfastened once the player has finished the opposite 3, during which the player controls enzyme Wong (without a partner). the sport additionally options the Mercenaries mode, wherever players fight hordes of enemies, and therefore the Agent Hunt mode that permits players to require management of random enemies in different people's games.
Resident Evil 6 Players will devour things quickly and alter weapons in real time. Players also are able to move whereas aiming their firearms. a replacement feature comes within the type of tablets, during which players will recover health at the push of a button. Resident Evil 6 additional tablets are often made by locatingherbs. By finding varied herbs and saving them before changing, additional tablets are often obtained from them. If one player runs out of health, that player can have a brief time to do and defend him/herself whereas his partner makes an attempt to revive them. If either player is killed, gameplay resumes at the last stop.Resident Evil 6 the sport has many primary enemies, as well as zombies and therefore the new introduced J'avo. in contrast to zombies, J'avo ar able to move with associateother} to arrange an attack, use weapons, and heal themselves.sure enemies drop ability points once killed, which might be picked up and spent on upgrades like increased weapon effectiveness or specific ammunition drops. Players will equip 3 of those upgrades that apply to any or all the campaigns. There ar scene events that need totally different approaches, like shooting at zombies, prying through a door, and trying to find keys during a vehicle. 


Resident Evil 6 system requirements
OS | Windows XP, windows 7 or Vista,Windows 8 |
CPU | Dual core 3.4Ghz |
RAM | 2 GB |
Hard disk | 8 Gb free disk space |
Graphics | 512 MB Graphics Memory |
Developer | None |
Direct-X | Version 8.1 or 9.0 |
Languages | English |
Download From |
Download links--
PART1
PART2
PART3
PART4
PART5
PART6
PART7
PART8
PART9
PART10
PART11
PART12
PART13
PART14
PART15
PART16
PART17
PART18
Subscribe to:
Comments (Atom)